
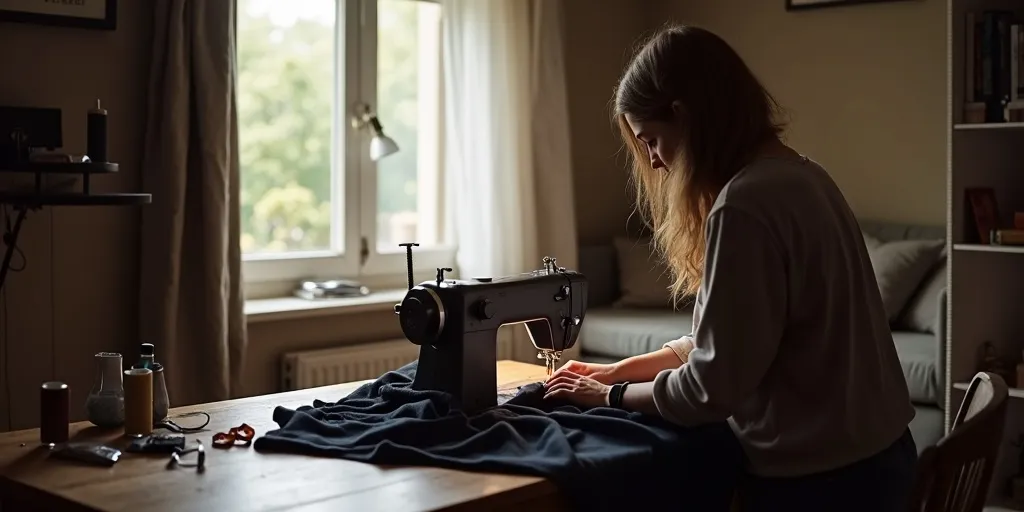
To sew blackout curtains, you will need to gather the necessary materials and follow a few simple steps. First, you will need blackout fabric, lining fabric, a sewing machine, thread, pins, scissors, and a measuring tape. Start by measuring the dimensions of your window and adding a few inches to allow for hems.
Cut your blackout fabric and lining fabric to the desired size, making sure they are the same dimensions. Next, place the blackout fabric on top of the lining fabric with the right sides facing each other and pin them together. Sew along the edges, leaving a small opening to turn the fabric right side out.
Once you have sewn the edges, turn the fabric right side out and press the seams flat. Finally, sew a top hem and bottom hem to finish off your blackout curtains. Hang them up in your desired location and enjoy the benefits of a darkened room.
With these simple steps, you can easily sew your own blackout curtains to block out unwanted light and create a cozy atmosphere in your home.
What materials are needed to sew blackout curtains?
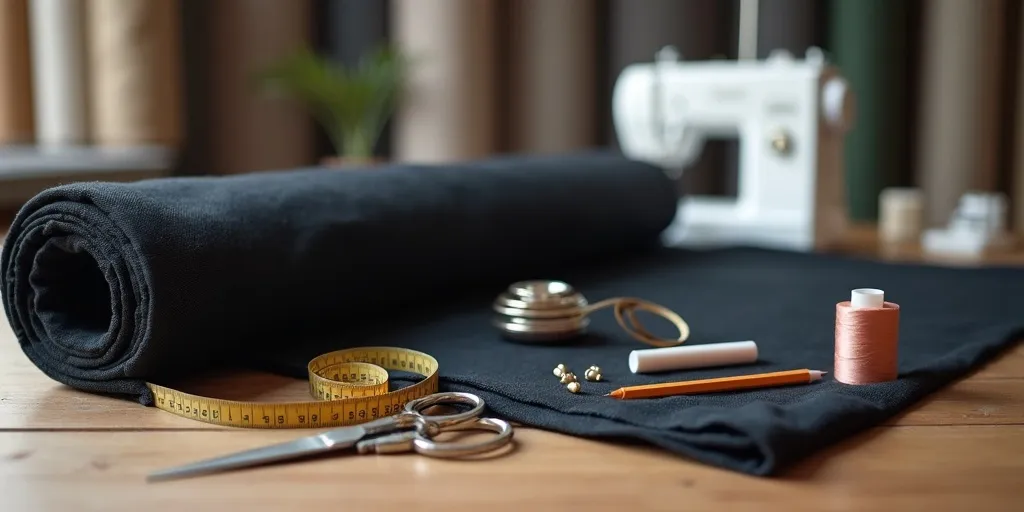
To sew blackout curtains, you will need a few key materials to ensure the desired outcome. Firstly, you will need blackout fabric, which is a specialized material designed to block out light and provide privacy. This fabric is typically made of a dense, tightly woven material that effectively blocks sunlight from entering a room.
Additionally, you will need a sewing machine with a heavy-duty needle capable of sewing through thick fabric. It is also important to have coordinating thread to ensure a seamless finish.
Other essential materials include fabric scissors for cutting the blackout fabric to the desired size, pins for securing the fabric in place while sewing, and a measuring tape to ensure accurate measurements. Lastly, you may also need a curtain rod or track to hang the finished blackout curtains.
By gathering these materials and following a sewing pattern or tutorial, you can create custom blackout curtains that not only enhance the decor of your space but also provide functionality by blocking out unwanted light.
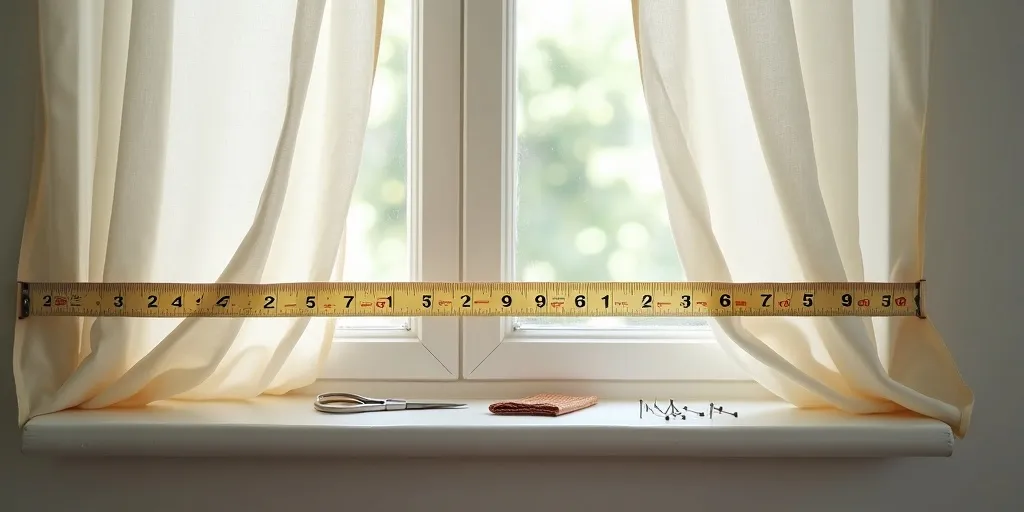
How do you measure the dimensions for blackout curtains?
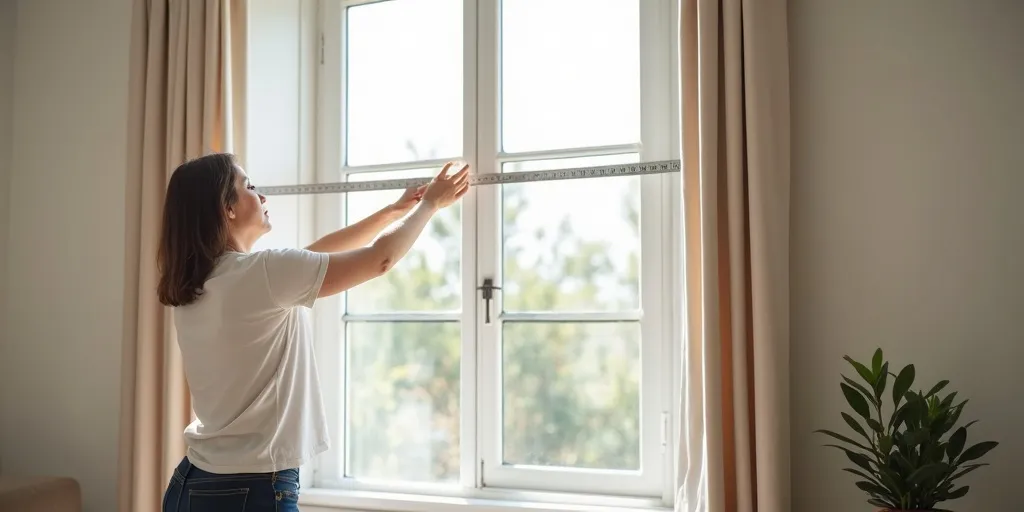
When measuring the dimensions for blackout curtains, it is important to first determine the width and length of the window or area you wish to cover. To measure the width, use a tape measure to find the distance from one side of the window frame to the other.
For the length, measure from the top of the window frame to where you want the curtains to end, whether it be at the floor or slightly above. It is recommended to add a few extra inches to both the width and length measurements to ensure full coverage and a proper fit.
Additionally, consider the type of curtain rod you will be using and whether you want the curtains to hang straight or have a gathered look when closed. Once you have these measurements, you can then select the appropriate size blackout curtains to purchase. By accurately measuring the dimensions of your window and considering your desired curtain style, you can ensure that your blackout curtains will fit properly and effectively block out unwanted light.
What is the process for sewing blackout fabric and lining together?

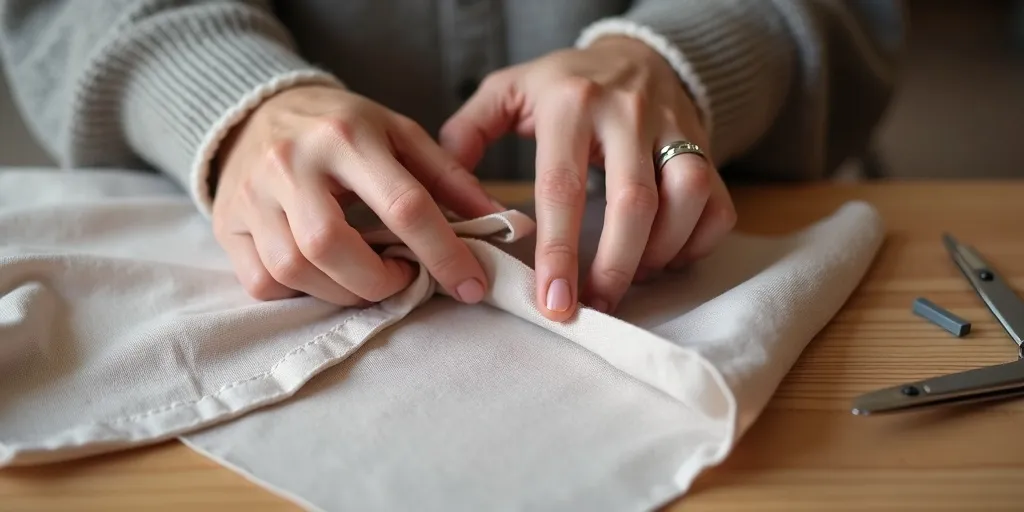
The process for sewing blackout fabric and lining together involves several steps to ensure a professional and effective result. First, lay out the blackout fabric and lining with the right sides facing each other. Pin the two pieces together along the edges to keep them in place.
Next, sew a straight stitch along the edges, leaving a small opening to turn the fabric right side out. Trim any excess fabric and clip the corners to reduce bulk. Turn the fabric right side out through the opening and press the seams flat with an iron. Once the fabric is turned right side out, topstitch around the edges to secure the layers together and create a clean finish.
Finally, close the opening with a slip stitch or a topstitch to complete the project. This process ensures that the blackout fabric and lining are securely attached and will effectively block out light when used in curtains or other projects.
By following these steps carefully, you can create a professional-looking finished product that will enhance the functionality and appearance of your project.
How do you turn the fabric right side out after sewing?
Turning the fabric right side out after sewing is a crucial step in completing a sewing project. To do this, start by locating the opening that was left in the seam for turning. Gently push the fabric through this opening, being careful not to stretch or distort the fabric.
Use your fingers or a blunt tool, such as a chopstick or knitting needle, to carefully push out the corners and edges of the fabric to ensure they are fully turned. Once the fabric is turned right side out, use the blunt tool to gently press along the seams to smooth out any wrinkles or creases.
If the fabric is particularly stubborn, you can use a iron on a low heat setting to help press out any stubborn wrinkles. Be sure to take your time and work carefully to avoid tearing or damaging the fabric. Once the fabric is turned right side out and pressed, you can then proceed with finishing the project by closing the opening with a slip stitch or topstitch.
What are the final steps to finish off blackout curtains?

The final steps to finish off blackout curtains involve a few key tasks to ensure they are properly installed and functioning effectively. First, make sure the curtains are properly hung on the curtain rod and adjusted to the desired length. This will ensure they cover the entire window and block out any unwanted light.
Next, consider adding a liner to the curtains for extra light-blocking capabilities. This can be done by sewing or attaching a blackout fabric to the back of the curtains. Additionally, you may want to hem the curtains to give them a clean and polished look.
This can be done by folding the fabric over and sewing a straight line along the bottom edge. Finally, consider adding tiebacks or holdbacks to the curtains to allow for easy opening and closing. This will not only add a decorative touch but also make it easier to let light in when desired.
By following these final steps, you can ensure your blackout curtains are fully functional and enhance the overall look of your space.
How can blackout curtains help create a cozy atmosphere?
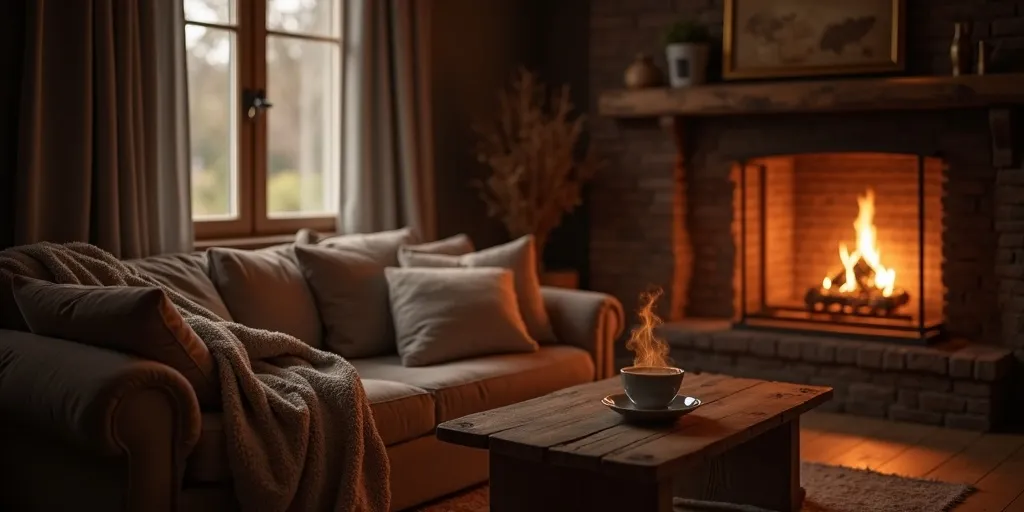
Blackout curtains can help create a cozy atmosphere in a variety of ways. Firstly, blackout curtains are designed to block out unwanted light, which can help create a dark and peaceful environment perfect for relaxation.
By keeping out sunlight, streetlights, and other sources of light, blackout curtains can help create a sense of privacy and intimacy in a room, making it feel more cozy and inviting. Additionally, blackout curtains can also help regulate the temperature in a room by blocking out drafts and insulating against heat or cold, creating a comfortable and snug atmosphere.
The thick fabric of blackout curtains can also help reduce noise from outside, creating a quieter and more peaceful environment. Overall, blackout curtains are a versatile and practical way to enhance the coziness of a room by creating a dark, quiet, and temperature-controlled space perfect for unwinding and relaxing.
Whether in a bedroom, living room, or home office, blackout curtains can help transform any space into a cozy retreat from the outside world.
What benefits do blackout curtains provide in a room?
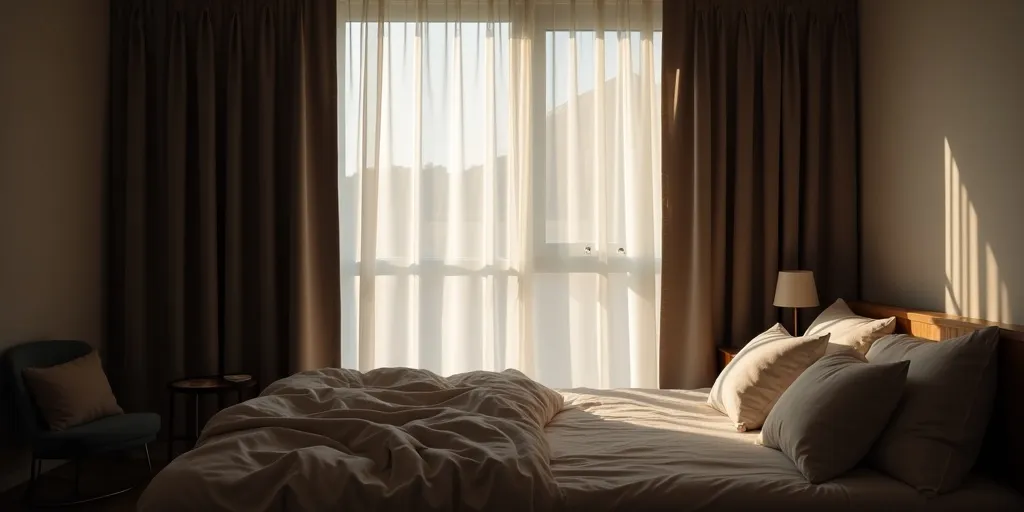
Blackout curtains offer a multitude of benefits when used in a room. Firstly, these curtains are designed to block out light, making them ideal for bedrooms where individuals may need to sleep during the day or for those who are sensitive to light when trying to rest at night.
By effectively blocking out sunlight, blackout curtains can create a dark and peaceful environment that promotes better sleep quality. Additionally, these curtains also provide privacy by preventing outsiders from being able to see into the room, making them a great option for bedrooms or living spaces that face busy streets or neighbors.
Furthermore, blackout curtains can help regulate the room’s temperature by insulating against heat in the summer and cold in the winter, ultimately reducing energy costs. Overall, blackout curtains are a practical and versatile addition to any room, offering benefits such as improved sleep quality, privacy, and energy efficiency.
How do you hang up blackout curtains once they are finished?

Once your blackout curtains are finished, hanging them up is a straightforward process that can greatly enhance the functionality of your space. To begin, you will need to gather the necessary tools, including a curtain rod, brackets, screws, a drill, and a level.
Start by measuring the width of your window and adding a few extra inches on each side to ensure full coverage. Next, install the brackets on either side of the window, making sure they are level and secure. Once the brackets are in place, slide the curtain rod through the rod pocket of the blackout curtains.
Finally, place the rod onto the brackets and adjust the curtains as needed to achieve the desired length and fullness. It is important to make sure the curtains are properly secured to prevent any light from seeping through. By following these steps, you can easily hang up your blackout curtains and enjoy a dark, peaceful environment whenever you desire.
What is the purpose of adding a few inches to the window measurements for hems?
The purpose of adding a few inches to the window measurements for hems is to ensure that the curtains or drapes will have enough fabric to create a clean and finished look once they are hung. By adding extra inches to the length and width of the window measurements, you allow for the fabric to be folded over and hemmed without appearing too short or skimpy.
This additional fabric also provides room for any adjustments that may need to be made during the sewing process, such as straightening out uneven edges or creating a more tailored appearance.
Additionally, having a bit of extra fabric to work with can help prevent any fraying or unraveling of the edges over time, ultimately prolonging the lifespan of your window treatments. Overall, adding a few inches to the window measurements for hems is a simple yet crucial step in ensuring that your curtains or drapes will hang beautifully and function effectively in your space.